
Easily Install WordPress Locally on Mac: A 7-Step Guide for Beginners(2024)
- Last updated on March 7, 2024
- / by
-
Waqas Munawer
Welcome to our beginner-friendly guide on how to install WordPress locally on your Mac. In this tutorial, we’ll walk you through the process step by step, making it easy for even the most novice WordPress developers to follow along.
Table of Contents
Why Install WordPress on Local Host?
How to install WordPress locally on Mac: Step-by-Step Guide
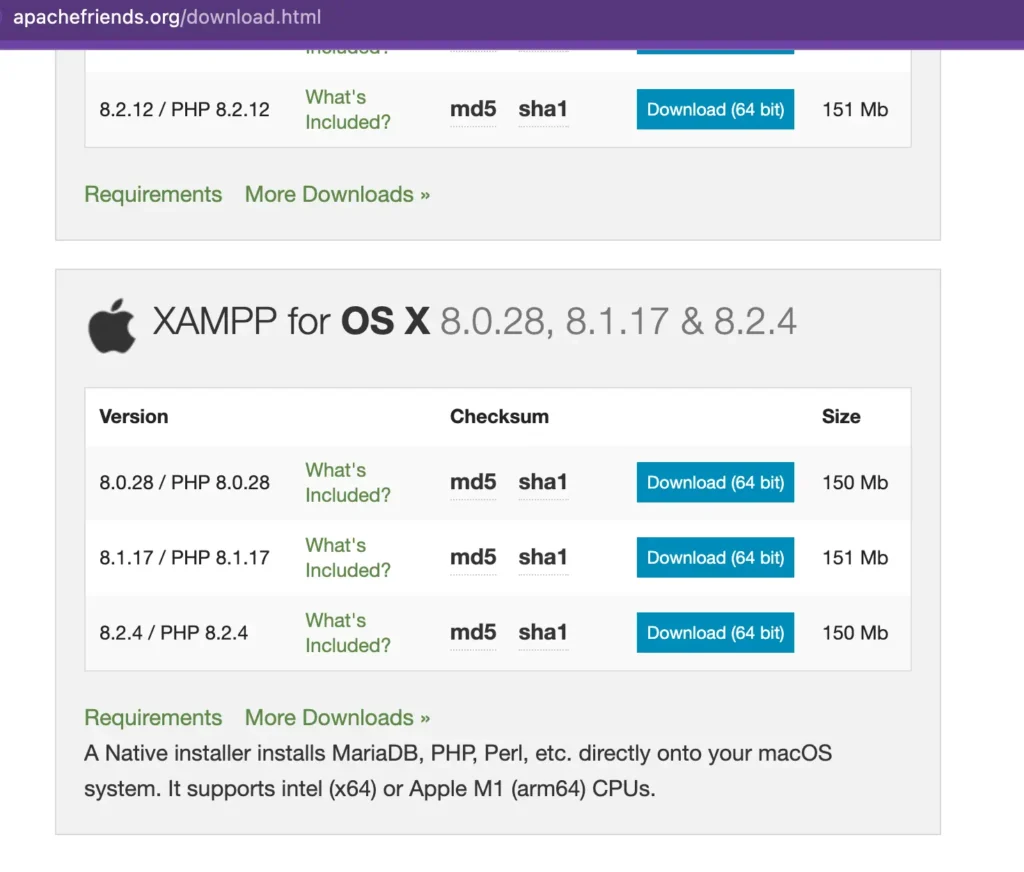
Step 1: Download XAMPP on Mac:
The first step in installing WordPress locally is to download and install XAMPP, a free and open-source cross-platform web server solution stack package developed by Apache Friends. Visit the official XAMPP website and download the version compatible with your Mac operating system.
Step 2: Install and Run XAMPP Setup on Mac:
After downloading the XAMPP installer, follow the on-screen instructions to install it on your Mac. Once you click on the XAMPP installer, you may encounter the warning below.
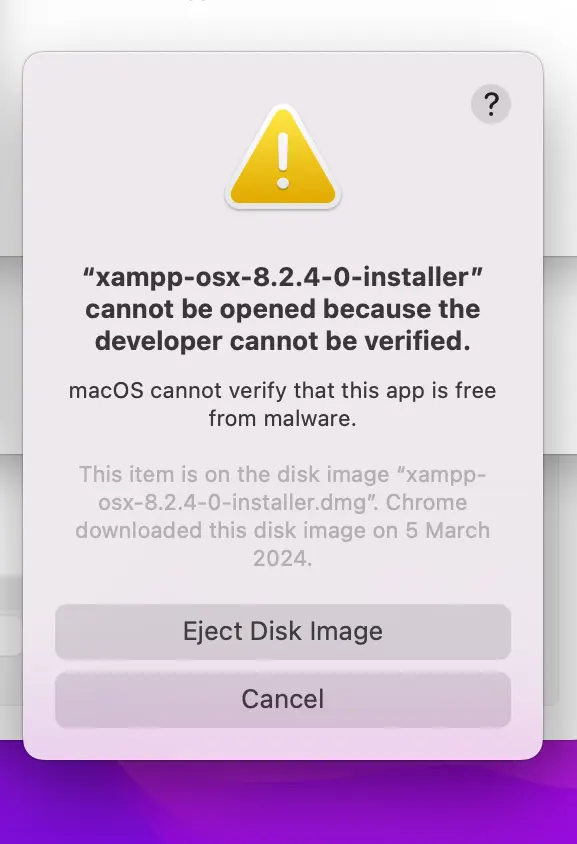
To resolve this issue, navigate to the Security & Privacy section on your Mac and ensure the ‘Allow apps downloaded from the App Store and identified developers’ option is enabled.

Step 3: Download WordPress on Mac:
Next, download the latest version of WordPress from the official WordPress.org website. After the download is complete, extract the WordPress files into a folder on your Mac.

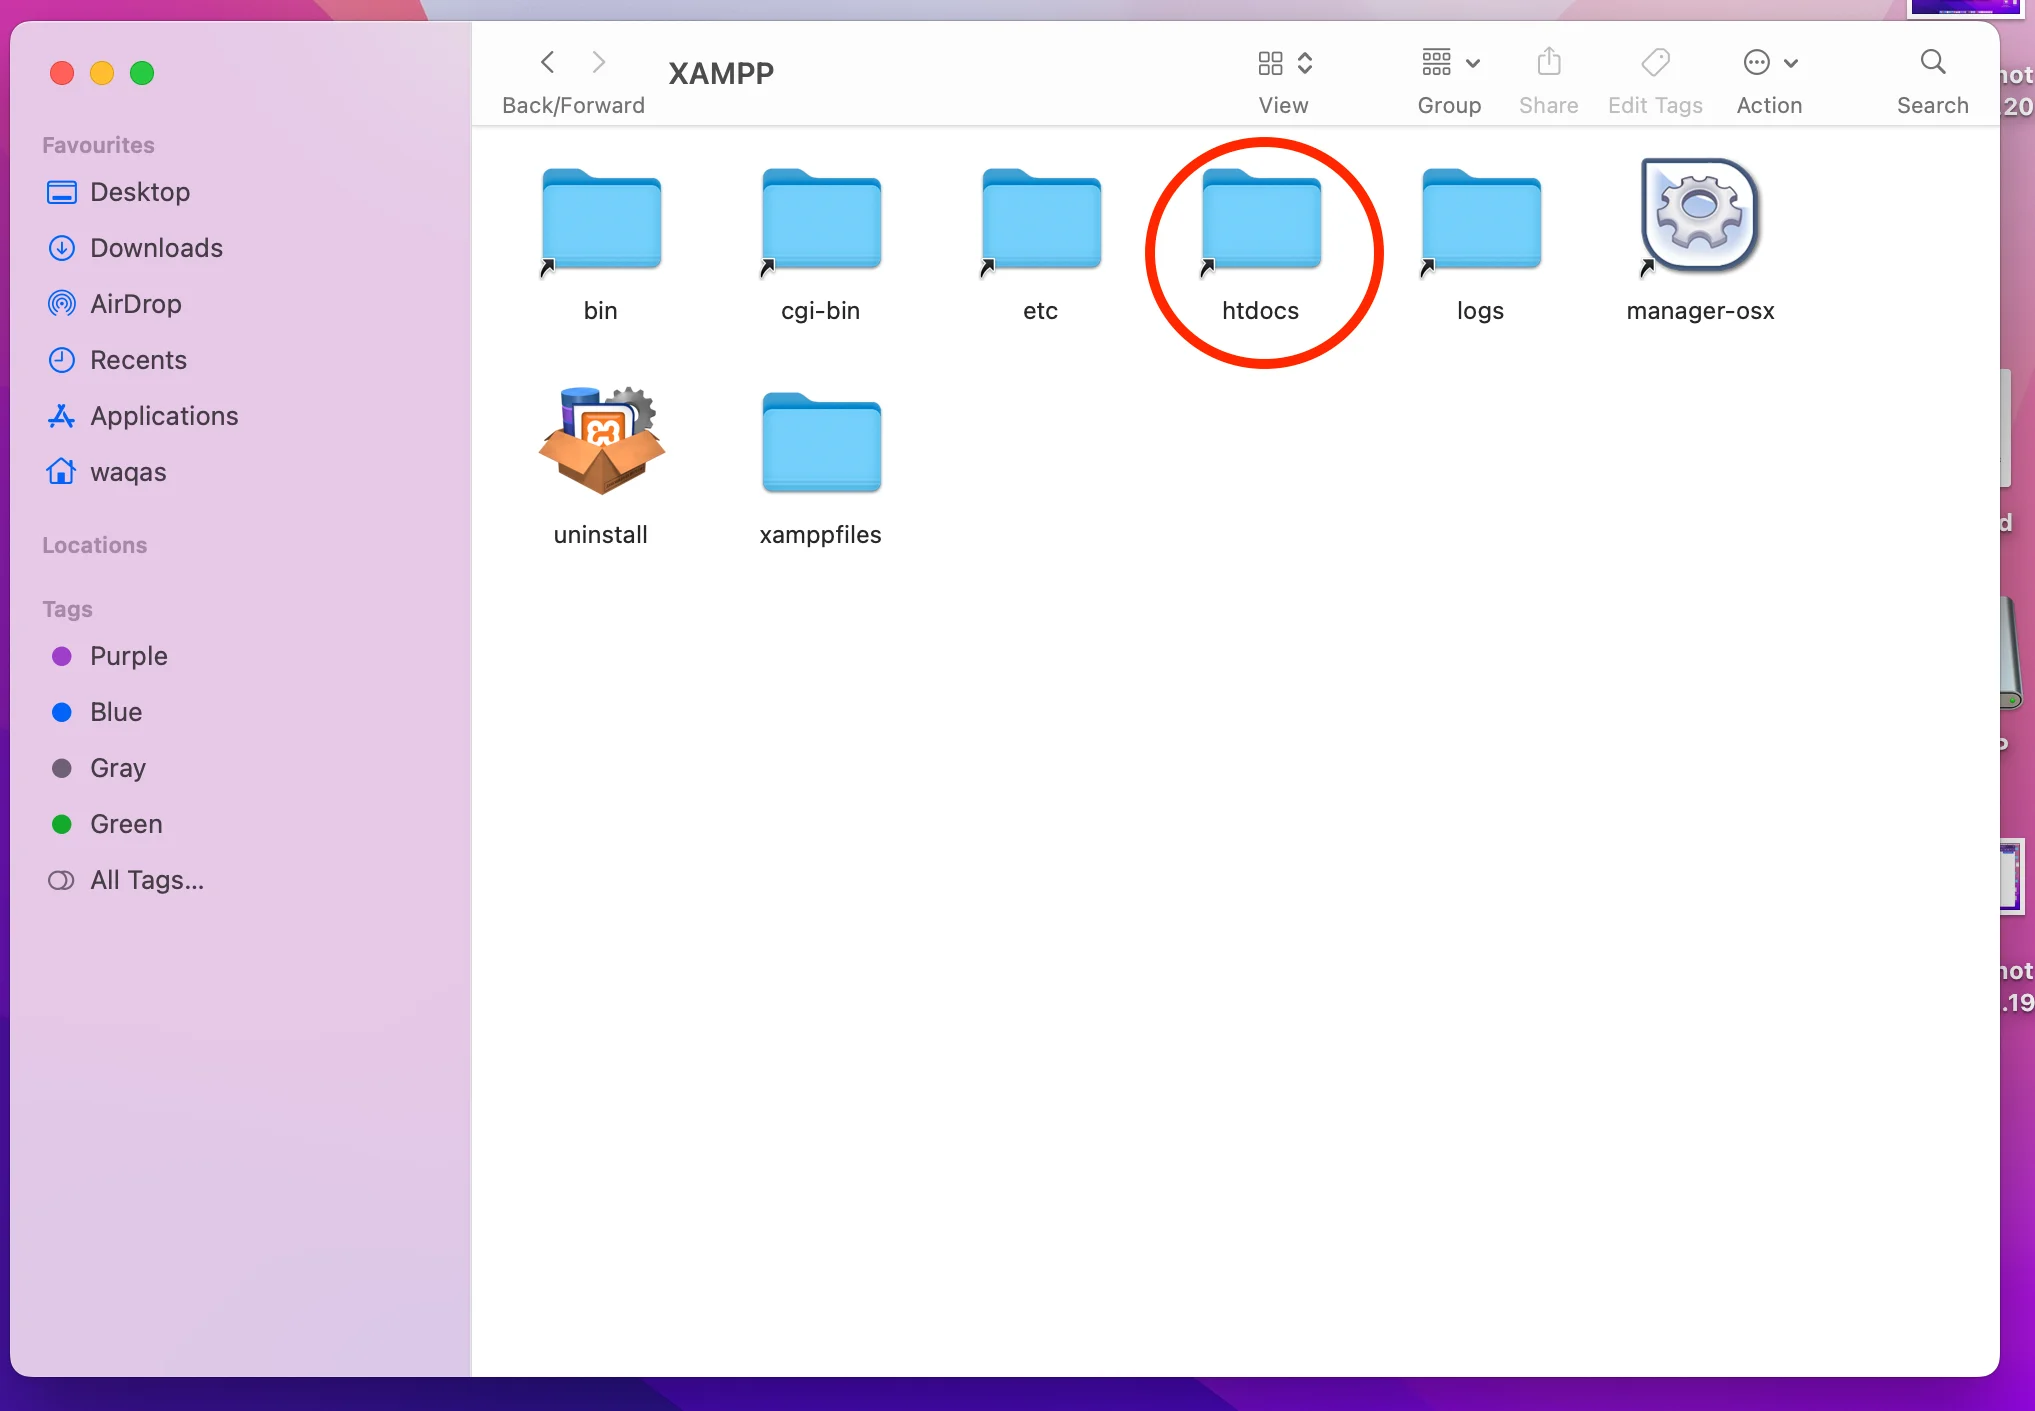
Step 4: Locate htdocs Folder from XAMPP:
Navigate to the XAMPP installation directory on your Mac and locate the ‘htdocs’ folder. This folder will act as the root directory for your local WordPress installation. Move the WordPress files from the folder you extracted in the previous step into this ‘htdocs’ folder.
Step 5: Create Local Database on XAMPP:
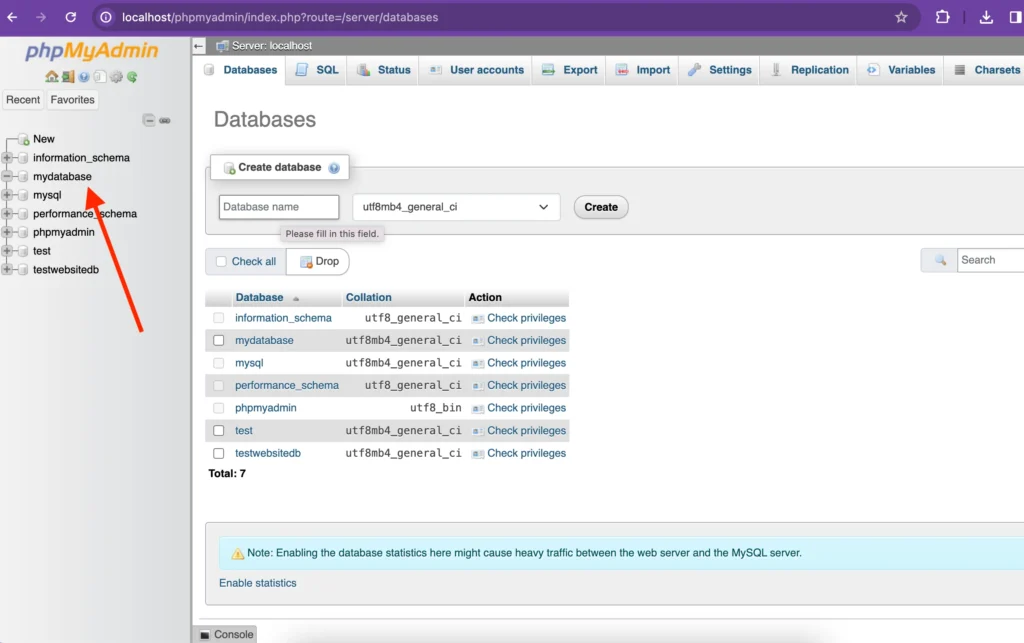
Before installing WordPress, you need to create a local database using phpMyAdmin, which is included with XAMPP. Access phpMyAdmin through your web browser and create a new database for your WordPress site. I have named the new database ‘mydatabase.’ There is no need to create any database tables; simply create a new database and name it as you wish.
Step 6: Install WordPress on Local Host:
Now it’s time to install WordPress on your localhost. Move the extracted WordPress files to the ‘htdocs’ folder and rename this folder to reflect your website’s name. I have named it ‘samplewebsite’.

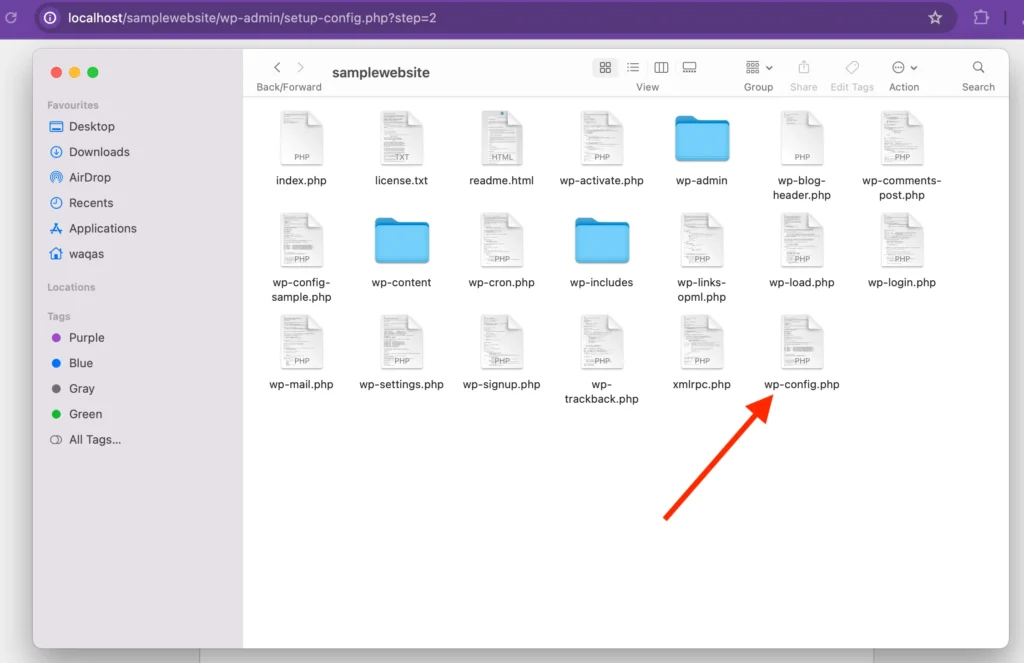
Now, access your local server environment through your web browser by typing http://localhost/samplewebsite. Follow the on-screen instructions to complete the WordPress installation process, including configuring database settings. Sometimes during the installation process, the wp-config.php file may not be created automatically. If you encounter this issue, refer to the error screen below for guidance.

To solve this, create a new wp-config.php file using any text editor. Paste the configuration code into this file and save it in ‘samplewebsite’ folder.
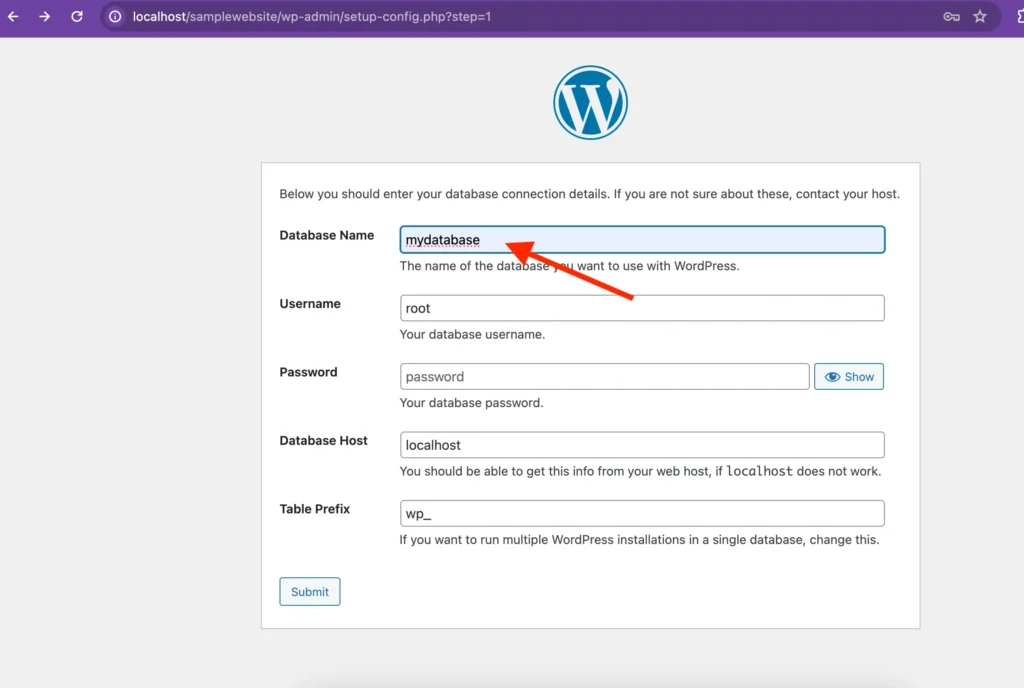
Set the Database Name to ‘mydatabase’, which was created in step 5. Use ‘root’ as the username, and leave the Password field empty.
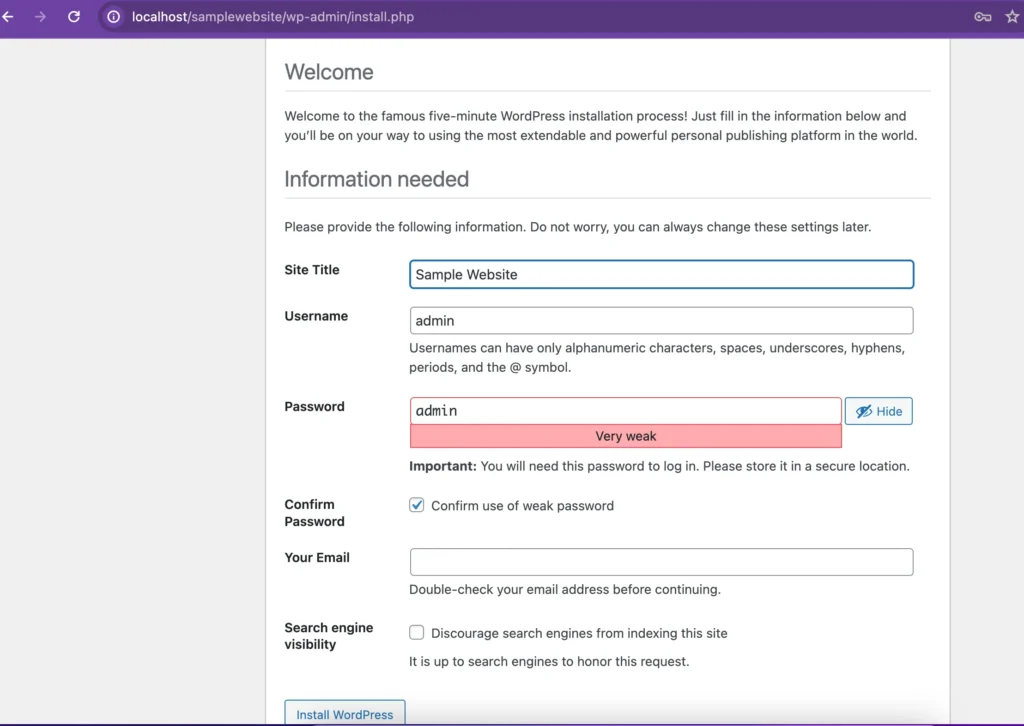
Set the Site Title, username, and Password for your website. In my case, I used ‘Sample Website’ as the website title, and ‘admin’ for both the Username and Password.
After a successful installation of WordPress, start the MySQL database and Apache server. Refer to the screenshot below for guidance.

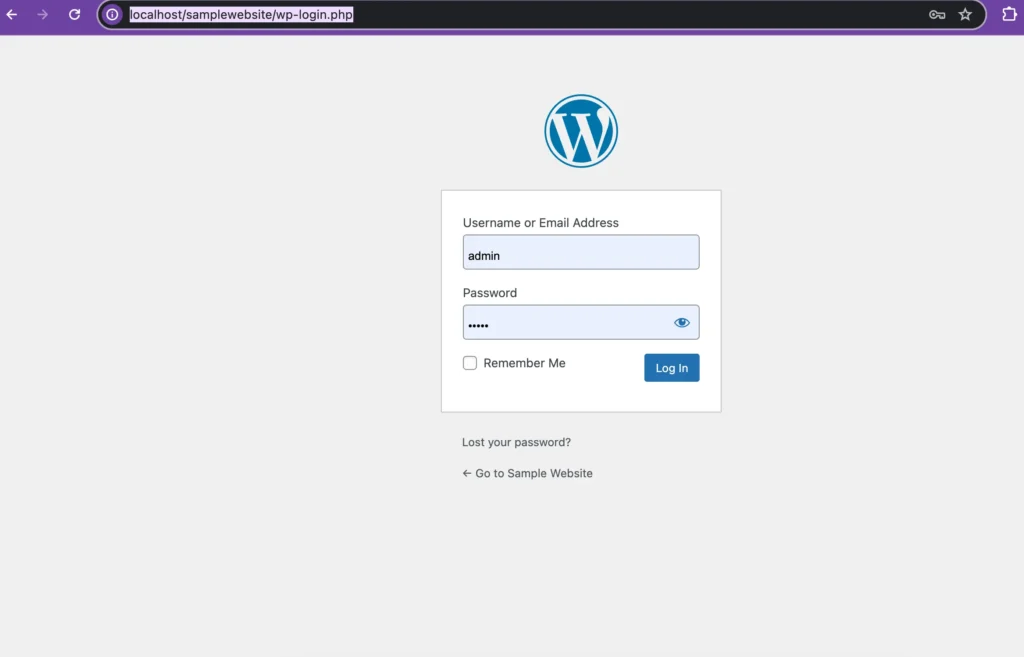
Step 7: Run the Local Site You Built:
Access the local site by typing “http://localhost/samplewebsite/wp-login.php” or “http://localhost/samplewebsite/wp-admin.php” into your web browser’s address bar. Both links will work to reach the WordPress login page.
Conclusion
In this guide, we’ve covered the step-by-step process of installing WordPress locally on your Mac using XAMPP. By following these instructions, you can create a safe and convenient environment for WordPress development and experimentation.
Frequently Asked Questions
Can I install WordPress locally on a Windows or Linux machine?
Yes, the process for installing WordPress locally is similar on Windows and Linux machines, but you’ll need to download the appropriate version of XAMPP for your operating system.
What are the advantages of installing WordPress locally?
Installing WordPress locally allows you to test themes, plugins, and website changes without affecting your live website. It also provides a safe environment for learning and experimenting with WordPress development.
Is it possible to move my locally installed WordPress site to a live server?
Yes, you can migrate your locally installed WordPress site to a live server by exporting the database, copying the WordPress files, and configuring the new server settings. There are several plugins and tutorials available to help guide you through the migration process.
Do I need an internet connection to work on my locally installed WordPress site?
No, once you’ve installed WordPress locally using XAMPP, you can work on your site offline without an internet connection. However, you’ll need an internet connection to download updates or access external resources like themes and plugins.