
How to Develop AI Tools on WordPress Using ChatGPT: A Step-by-Step Guide
- Last updated on March 27, 2024
- / by
-
Waqas Munawer

Are you ready to dive into the world of AI tools right from your WordPress website? In this step-by-step guide, we’ll explore how to leverage the power of ChatGPT to create personalized AI tools on WordPress, starting with a YouTube Title Generator.
If you’re interested in exploring another fascinating tool creation journey, check out my blog on How I Developed a WEBP to PNG Converter Tool with WordPress in 5 Minutes Using ChatGPT for more inspiration. Additionally, discover how AI-driven tools can revolutionize your website’s functionality and user experience. Whether you’re a student eager to explore the realms of AI or a beginner-level WordPress developer looking to expand your skillset, this guide will equip you with the knowledge and tools necessary to succeed. Plus, don’t miss out on valuable insights from industry experts by exploring resources like AI Trends to stay updated on the latest advancements and trends in artificial intelligence. Let’s embark on this exciting journey of innovation and creativity!
Table of Contents
Why Create Online AI Tools on WordPress Websites?
Enhanced User Engagement
Improved Efficiency
Competitive Edge
AI Tool Components:
WordPress Tool Page
Tool HTML Code
Javascript Function for Making OpenAI API Calls
PHP Function for OpenAI API Calls
Finally, we’ll create a PHP file containing function to handle API calls to OpenAI. This PHP code snippet will facilitate communication with the OpenAI platform, processing user inputs, generating AI-driven responses, and delivering them back to the user in a structured format.
Step-by-Step Guide for YouTube Title Generator:
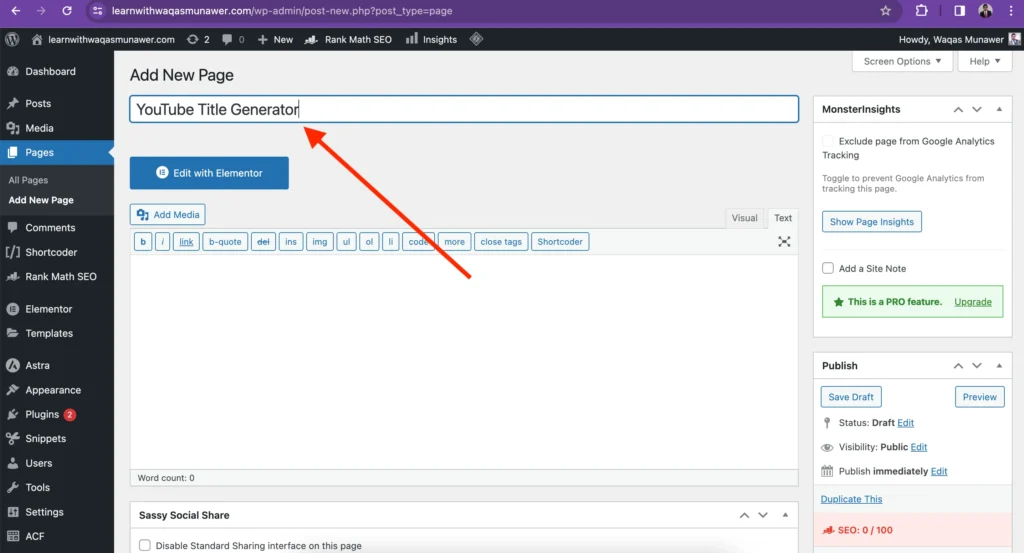
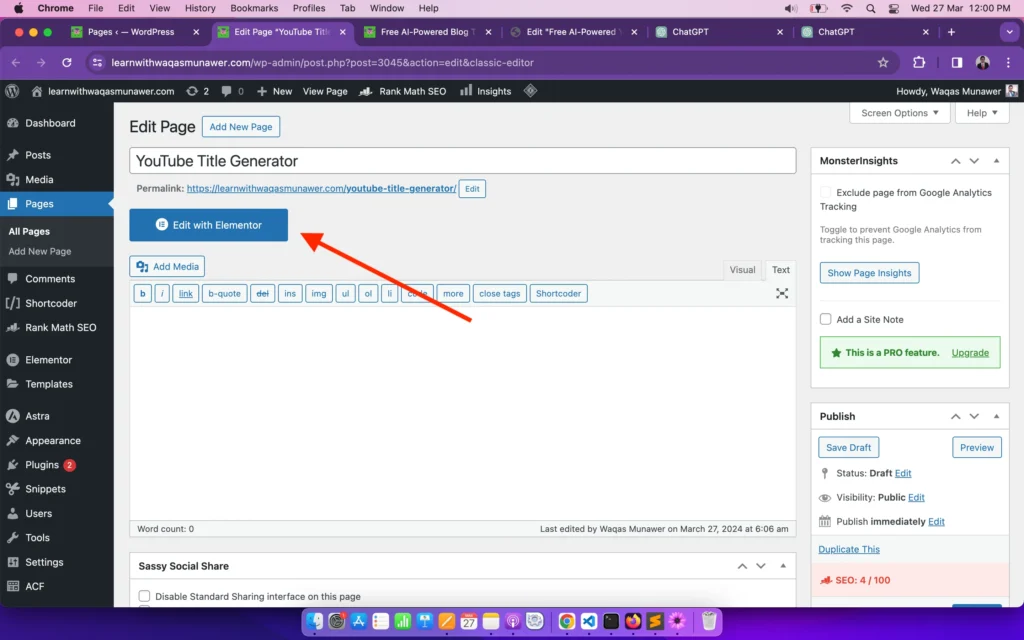
STEP 1: Create a Tool Page on the WordPress Dashboard
STEP 2: Generate HTML Code for the Tool UI Using ChatGPT

UI Design Prompt
STEP 3: Add HTML Code to the WordPress Tool Page

STEP 4: Implement JavaScript Function for User Inputs
					<!DOCTYPE html>
<html lang="en">
<head>
  <meta charset="UTF-8">
  <meta name="viewport" content="width=device-width, initial-scale=1.0">

  <style>
    .container {
      max-width: 600px;
      margin: 0 auto;
      padding: 20px;
    }
    .error-message {
      color: red;
      font-size: 12px;
      margin-top: 5px;
    }
    h1 {
      text-align: center;
    }
    label {
      font-weight: bold;
    }
    select, input[type="text"] {
      width: 100%;
      padding: 8px;
      margin-bottom: 10px;
    }
    button {
      padding: 10px;
      background-color: #48C031;
      color: #fff;
      border: none;
      cursor: pointer;
      margin-bottom: 10px;
    }
    button:hover {
      background-color: #0056b3;
    }
    .loading-spinner {
      border: 6px solid #f3f3f3;
      border-top: 6px solid #007bff;
      border-radius: 50%;
      width: 50px;
      height: 50px;
      animation: spin 1s linear infinite;
      margin: 0 auto;
      display: none;
    }
    @keyframes spin {
      0% { transform: rotate(0deg); }
      100% { transform: rotate(360deg); }
    }
    .copy-title-button {
      margin-left: 10px;
      background-color: #48C031;
      color: white;
      border: none;
      cursor: pointer;
      padding: 4px 8px;
      text-decoration: none;
      display: inline-block;
      font-size: 14px;
      border-radius: 5px;
    }
    .copy-all-titles-button {
      display: none;
      background-color: #48C031;
      margin-top: 10px;
    }
    .copy-all-titles-button.show {
      display: block;
    }

    /* Updated styles for the list view */
    #titleResults {
      display: none; /* Hide by default */
      border: 1px solid #ccc;
      border-radius: 5px;
      padding: 10px;
    }

    #titleResults.show {
      display: block; /* Display when titles are fetched */
    }

    #titleResults ul {
      list-style: none;
      padding: 0;
      margin: 0;
    }

    #titleResults ul li {
      border-bottom: 1px solid #ccc;
      padding: 8px 0;
    }

    #titleResults ul li:last-child {
      border-bottom: none;
    }
   /* Additional styles for the link */
    .link-container {
      display: flex;
      justify-content: flex-end;
      margin-top: -10px !important; /* Reduce top margin */
    }

    .link-container a {
      margin-top: -10px !important; /* Reduce top margin */
    }

  </style>
</head>
<body>
  <div class="container">
    <label for="videoKeyword">Video Keyword:</label>
    <input type="text" id="videoKeyword" name="videoKeyword" required>
    <span id="videoKeywordError" class="error-message"></span><br><br>

    <label for="titleLength">Title Length:</label>
    <select id="titleLength" name="titleLength">
      <option value="short">Short</option>
      <option value="medium">Medium</option>
      <option value="long">Long</option>
    </select><br><br>

    <label for="titleVariation">Title Variation:</label>
    <select id="titleVariation" name="titleVariation">
      <option value="conservative">Conservative</option>
      <option value="creative">Creative</option>
      <option value="balanced">Balanced</option>
      <option value="seo-optimized">SEO-Optimized</option>
    </select><br><br>

      <label for="titleTone">Title Tone:</label>
    <select id="titleTone" name="titleTone">
      <option value="formal">Formal</option>
      <option value="casual">Casual</option>
      <option value="humorous">Humorous</option>
      <option value="professional">Professional</option>
	  <option value="inspirational">Inspirational</option>
	  <option value="educational">Educational</option>
	  <option value="engaging">Engaging</option>
	   <option value="neutral">Neutral</option>

    </select><br><br>

     <label for="openAiKey">OpenAI API Key:</label>
    <input type="text" id="openAiKey" name="openAiKey" placeholder="sk-" required>
    <span id="openAiKeyError" class="error-message"></span><br><br>
<!-- Updated link placement -->
    <div class="link-container">
      <a href="https://www.youtube.com/watch?v=aVog4J6nIAU" target="_blank" rel="noopener">Click here to see where you can find OpenAI API key</a>
    </div>

    <button id="generateTitlesBtn">Generate Titles</button>
    <button id="copyAllTitlesBtn" class="copy-all-titles-button">Copy All Titles</button>

    <div id="loadingSpinner" class="loading-spinner"></div> <!-- Loading spinner -->

    <div id="titleResults">
      <!-- Titles will be displayed here -->
    </div>
  </div>

  <script>
    document.getElementById('generateTitlesBtn').addEventListener('click', function(event) {
      event.preventDefault();

      // Clear previous titles data
      document.getElementById('titleResults').innerHTML = '';

     // Hide the "Copy All Titles" button
      document.getElementById('copyAllTitlesBtn').classList.remove('show');

     // Hide the title results section
      document.getElementById('titleResults').classList.remove('show');


      const videoKeyword = document.getElementById('videoKeyword').value;
      const titleLength = document.getElementById('titleLength').value;
      const titleVariation = document.getElementById('titleVariation').value;
      const titleTone = document.getElementById('titleTone').value;
       const openAiKey = document.getElementById('openAiKey').value;

      // Inline data validation for video keyword
      if (videoKeyword === '') {
        const videoKeywordError = document.getElementById('videoKeywordError');
        videoKeywordError.textContent = 'Please enter a video keyword.';
        return;
      }
      // Inline data validation for video keyword
      if (openAiKey === '') {
        const openAiKeyError = document.getElementById('openAiKeyError');
        openAiKeyError.textContent = 'Please enter your OpenAI API Key.';
        return;
      }

      // Clear any previous error message
      document.getElementById('videoKeywordError').textContent = '';

      // Show loading spinner
      showLoadingSpinner();

      const prompt = `As an expert in creating viral YouTube title generators, your task is to generate 5 unique YouTube titles based on different input values provided by a user. The user will specify various input options for title generation, including Video Keyword, Title Length (Short, Medium, Long), Different Title Variations (Conservative, Creative, Balanced, SEO-Optimized), and Tone Selection Options (Formal, Casual, Humorous, Professional,Inspirational,Educational,Engaging,Neutral).Ensure that the generated titles are not generic and have not been created numerous times before. Titles should be provided in JSON format, with a single key named "titles" containing the generated titles.
      Inputs:
        Here are the metrics provided in the user input:
        1. Keyword for the YouTube video is ${videoKeyword}.
        2. Title length  is ${titleLength}.
        3. Title variation is ${titleVariation}.
        4. Tone Selection is ${titleTone}.

        Sample Output JSON:
        {
        	"titles": ["This is title 1", "This is title 2", "This is title 3", "This is title 4", "This is title 5"]
        }`;

      const formData = new FormData();
      formData.append('action', 'openai_generate_text');
      formData.append('user_prompt', prompt);
      formData.append('api_key', openAiKey);


      fetch('/wp-admin/admin-ajax.php', {
        method: 'POST',
        body: formData
      })
      .then(response => response.json())
      .then(data => {
        if (data.success) {
          const titles = JSON.parse(data.data.choices[0].message.content).titles;
          displayTitles(titles);
          document.getElementById('copyAllTitlesBtn').classList.add('show');

          // Show the titles section
          document.getElementById('titleResults').classList.add('show');
        } else {
          alert('An error occurred: ' + data.data);
        }
        // Hide loading spinner
        hideLoadingSpinner();
      })
      .catch(error => {
        alert('An error occurred: ' + error.message);
        // Hide loading spinner
        hideLoadingSpinner();
      });
    });

    document.getElementById('copyAllTitlesBtn').addEventListener('click', function(event) {
      event.preventDefault();
      const titles = document.querySelectorAll('#titleResults ul li');
      const allTitles = Array.from(titles).map(title => title.textContent).join('\n');
      copyToClipboard(allTitles);
    });

    function displayTitles(titles) {
      const titleResultsDiv = document.getElementById('titleResults');
      const ul = document.createElement('ul');
      titles.forEach(title => {
        const li = document.createElement('li');
        li.textContent = title;

        // Create Copy button
        const copyButton = document.createElement('button');
        copyButton.textContent = 'Copy';
        copyButton.className = 'copy-title-button';
        copyButton.addEventListener('click', function() {
          copyToClipboard(title);
        });
        li.appendChild(copyButton); // Append Copy button to each title item

        ul.appendChild(li);
      });
      titleResultsDiv.innerHTML = ''; // Clear previous titles
      titleResultsDiv.appendChild(ul);
    }

    function showLoadingSpinner() {
      const loadingSpinner = document.getElementById('loadingSpinner');
      loadingSpinner.style.display = 'block';
    }

    function hideLoadingSpinner() {
      const loadingSpinner = document.getElementById('loadingSpinner');
      loadingSpinner.style.display = 'none';
    }

    function copyToClipboard(text) {
      const textarea = document.createElement('textarea');
      textarea.value = text;
      document.body.appendChild(textarea);
      textarea.select();
      document.execCommand('copy');
      document.body.removeChild(textarea);
      alert('Copied to clipboard: ' + text);
    }
  </script>
</body>
</html>
STEP 5: Create a New PHP Code Snippet for OpenAI API Calls

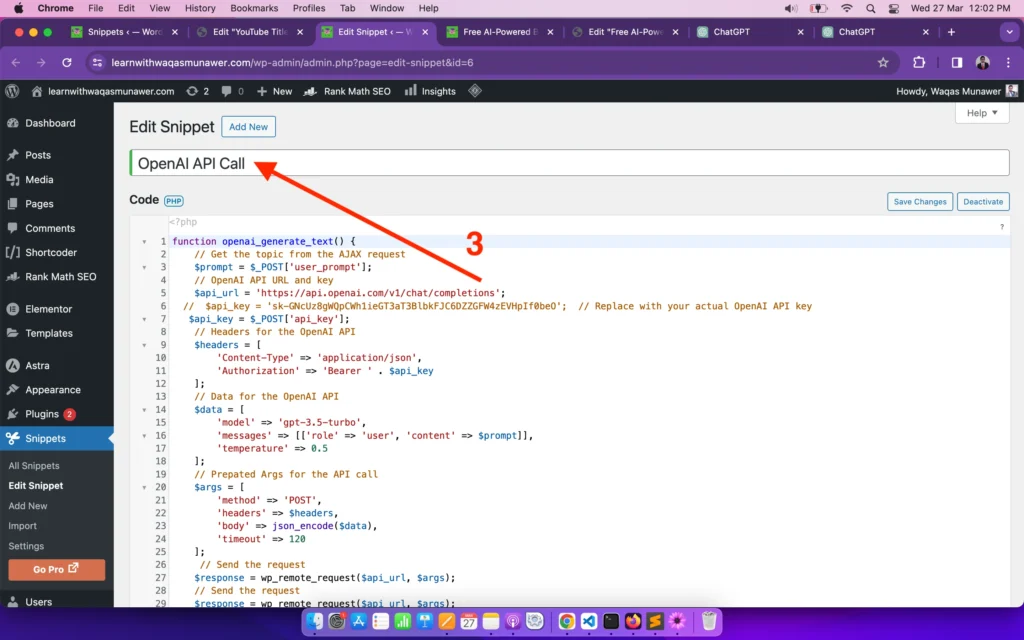
PHP Code for OpenAI API Calls
Please ensure that you replace ‘api_key’ with your actual OpenAI API key in the PHP code provided below. You can find your OpenAI API key by following this link.
					function openai_generate_text() {
    // Get the topic from the AJAX request
    $prompt = $_POST['user_prompt'];
    // OpenAI API URL and key
    $api_url = 'https://api.openai.com/v1/chat/completions';
  //  $api_key = 'sk.......';  // Replace with your actual OpenAI API key
   $api_key = $_POST['api_key'];
	// Headers for the OpenAI API
    $headers = [
        'Content-Type' => 'application/json',
        'Authorization' => 'Bearer ' . $api_key
    ];
	// Data for the OpenAI API
    $data = [
        'model' => 'gpt-3.5-turbo',
        'messages' => [['role' => 'user', 'content' => $prompt]],
        'temperature' => 0.5
    ];
	// Prepated Args for the API call
    $args = [
        'method' => 'POST',
        'headers' => $headers,
        'body' => json_encode($data),
        'timeout' => 120
    ];
	 // Send the request
    $response = wp_remote_request($api_url, $args);
	// Send the request
    $response = wp_remote_request($api_url, $args);
	if (is_wp_error($response)) {
        $error_message = $response->get_error_message();
        wp_send_json_error("Something went wrong: $error_message");
    } else {
        $body = wp_remote_retrieve_body($response);
        $data = json_decode($body, true);
        if (json_last_error() !== JSON_ERROR_NONE) {
            wp_send_json_error('Invalid JSON in API response');
        } elseif (!isset($data['choices'])) {
            wp_send_json_error('API request failed. Response: ' . $body);
        } else {
            wp_send_json_success($data);
        }
    }
    // Always die in functions echoing AJAX content
   wp_die();

}
add_action('wp_ajax_openai_generate_text', 'openai_generate_text');
add_action('wp_ajax_nopriv_openai_generate_text', 'openai_generate_text');
Congratulations! You’ve successfully created an AI-powered YouTube Title Generator on your WordPress website using ChatGPT. By following this step-by-step guide, you’ve unlocked the potential of AI to enhance user engagement, improve efficiency, and stay ahead of the competition. Now, it’s time to explore further possibilities and unleash your creativity with AI tools.
Be sure to check out the fully functional tool, which I have developed and published on my website.

Frequently Asked Questions:
Yes, you can customize the design of the UI by modifying the HTML code generated by ChatGPT and adjusting the CSS styles to suit your preferences.
Is any coding experience required to implement AI tools on WordPress?
While basic knowledge of HTML, CSS, JavaScript, and PHP is beneficial, you can follow this guide step-by-step, even as a beginner-level WordPress developer or student, to create AI tools with ease.
Are there any limitations to the number of AI tools I can create on my WordPress website?
No, there are no inherent limitations. You can create multiple AI tools on your WordPress website, each serving different purposes and catering to diverse audience needs.
How frequently should I update the AI models powering my tools?
It’s advisable to stay updated with the latest advancements in AI technology and periodically update the models powering your tools to ensure optimal performance and accuracy.